How to make background transparent in Photoshop 2022
How To Make Background Transparent in Photoshop 2022 - Clipping Path Universe
Making a Transparent Background Using Photoshop Pen Tool
If you are on a hunt for professional assignments, the photoshop pen tool is the greatest technique for backdrop removal and transparent background creation.
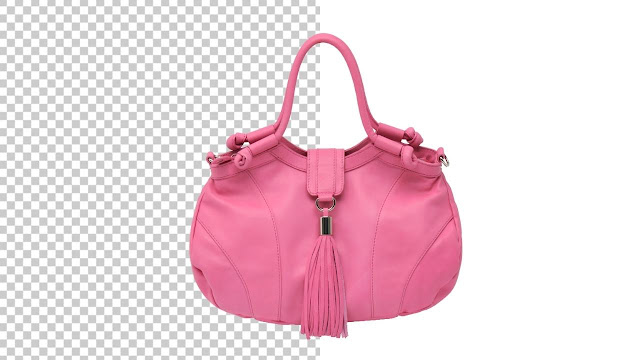
The picture I picked for this purpose:-
Open the Layers panel. If you don't see this panel by default, it's located to the right of your picture window and can be accessed by selecting Window > Layers from the dropdown menu in the application's window's upper left corner.
Double-click the Background layer in the Layers panel. As soon as the New Layer dialog box appears, you'll be asked to rename the layer. Simply click the OK button to keep this as the default Layer 0.
Once unlocked, whatever you erase from the background layer will be translucent.
The second step is to choose your choice. Right-click on an area of the image and choose "Magic Wand" from its Toolbar. Click on the Options bar at the top of the screen, then choose the subject you want. Regardless of the backdrop, Photoshop will try to choose the item in your shot. If you look closely, you'll notice "marching ants" around your choice.
In case the selection isn't right, you may use the Magic Wand Tool to remove more of the background from the selection or to add more of the product.
Photoshop didn't remove the watch's shadow entirely from the selection in this case, so we'll use the Options bar's Subtract from the selection button and the Magic Wand tool to pick just the watch.
Select any sections of your product picture where there are "holes," such as where the watch face meets the bracelet when making your pick.
Step 3: Remove the backdrop from the image.
Select the inverse by pressing SHIFT+CTRL+I (SHIFT+COMMAND+I on a Mac) or by selecting Select > Inverse from the drop-down menu at the top of the program window.
4) Save your picture in an internet-friendly format.
The first step in creating a transparent backdrop in Photoshop is to ensure that your product picture is saved in the right format so that it can be shown on your eCommerce website with a transparent background.
Your picture should be saved in a PNG-24 file type. In this format, you may use many levels of transparency, so your picture will never seem pixelated in the middle of an otherwise solid backdrop color. It's best to avoid using PNG-8 and GIF because of the possibility of an unwanted halo effect.
What are the best practices for optimizing photographs for the web?
This option is available in Photoshop CC by pressing the combination of SHIFT + ALT + CTRL W (SHIFT+OPTION COMMAND W on a Mac) or selecting File > Export > Export As... from the drop-down menu in the program window's upper right corner of the screen.
In previous versions of Photoshop, if you don't see the Export As... option, you may save for the web and pick PNG-24 from the Preset dropdown menu on the right-hand side of the dialog box.
You'll need to choose PNG as the file format and tick the Transparency option in the dialog box that pops up. Checking Smaller File (8-bit) will convert the file to a PNG-8, which is not what you want!
You can see the estimated size of your PNG file on the left side of the picture. Keep an eye on this since greater file sizes can slow down your website. Web pictures should, in my opinion, be no more than 200 KB in size.
On the right side of the dialog box, under Image Size, you may change the image's dimensions. The lower the dimensions, the smaller the file size is. To avoid fuzzy photographs, you don't want to reduce the size of your images; doing so will result in images that seem pixelated.
You should also save your product image at a size 50%–100% bigger than the size you expect it to be. This is because many of your customers will be viewing your product on a retina display. This will improve the image's sharpness across all platforms. To put it another way, if your product will display at a maximum width of 400 pixels, you should create it at least 600 pixels wide.
As a result, you'll have to deal with a little bit of a balancing act to have the best of both worlds. Featured product photographs can be saved at a higher resolution for retina screens, while the other images can be loaded faster since they are stored at their original size.
The last step is to save your document.
Click Export All after you've set your Image Size to the right specifications.
In the Save dialog box, choose the location where your web-ready product photos are stored. In order to minimize confusion when uploading photos to your website, it's best to keep your optimized image files separate from your original image files. Make sure the.png extension is specified on the picture file's name.
To save your work, click the Save button.
Towab Muhammad Yusuf
Clipping Path Universe


Thanks for sharing the information keep updating, looking forward to more post, BookMyEssay provides a free apa format generator free services to students, making academic writing easier. Create precise citations and references with ease, ensuring your papers follow APA style rules.
ReplyDeletesdasa
ReplyDeleteGreat Post thanks for thisBoost your online presence with Qdexi Technology's top-notch search engine optimization service. Dominate search rankings and drive organic traffic today!
ReplyDeleteLooking for a Next.js expert? Hire Freelancer Next.js on Paperub for top-notch Next.js development and get your project rolling!
ReplyDeleteI like this post, Discover the joy of underwater adventures with MyFirsToys' robo fish toys! Dive into endless fun with lifelike swimming companions. Buy now!
ReplyDelete